 Канал на RUTUBE:
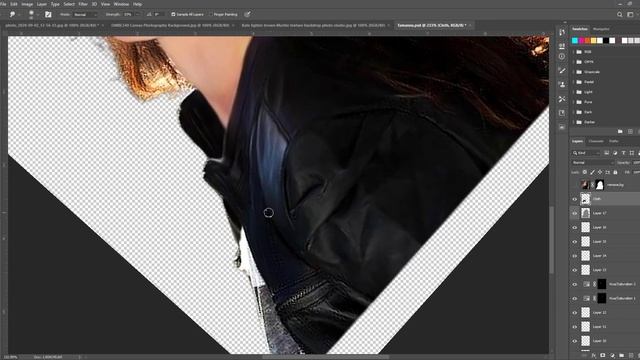
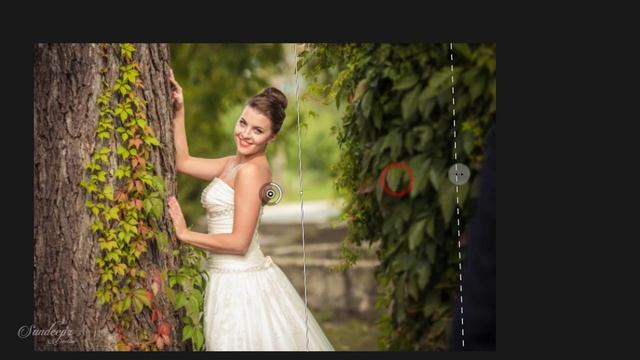
In this video, I am going to show you how I like to sharpen my images in Photoshop in a non-destructive way using a high pass filter.
There are other non-destructive ways of sharpening an image but I prefer the high pass method because I feel like it gives me the most control in term of the intensity and the area of which I want to sharpen.
I can also see in the sharpen layer exactly where and how much of the image edges are being affected.
In the video, I am going to you the normal destructive way of adding sharpening to an image and then I am going to show you my preferred non-destructive way of doing it.
Normal Way: 00:33 - 01:30
Non-Destructive Way: 01:44 - 06:20
-----
Also like, Comment & Subscribe to stay updated with the latest content! :)
-----
LIGHTROOM PRESETS
ART PRINTS
BLOG: PHOTOGRAPHY ANS DESIGN
-----
► Follow Me ◄
INSTAGRAM:
WEBSITE:
AMITY COMMUNITY:
FACEBOOK:
MAPIFY:
EMAIL: jacksonchengphotography@gmail.com
-----
► GEAR USED IN THIS VIDEO ◄
FujiFilm XT3
FujiFilm Fujinon XF 18-55mm f2.8-4 R LM OIS
FujiFilm Battery NP-W126s
SanDisk Extreme Pro SD Card 300mb/s 64gb
SanDisk Extreme Pro SD Card 300mb/s 128gb
-----
► OTHER CAMERA GEAR THAT I OWN ◄
Canon 5d Mark ii:
Canon EF 17-40mm f/4L:
Canon 24–105mm f/4L:
Canon EF 50mm f/1.8 STM Lens:
Glidecam HD-2000 Handheld Stabilizer
-----► PHONE VIDEO GEAR ◄
Zhiyun Smooth Gimbal:
Filmic Pro:
-----
Music:
Rock Angel by Joakim Karud Creative Commons — Attribution-ShareAlike 3.0 Unported— CC BY-SA 3.0 Music promoted by Audio Library
-----
#photoshop #imagesharpening #photoshopcc2019
Источник: rutube.ru